【7】树莓派图像分类部署
树莓派学习笔记,树莓派图像分类部署
【7】树莓派图像分类部署
# 树莓派学习笔记
2024/6/15
参考视频 Python+树莓派+Linux 快速上手 (opens new window); 树莓派教程十分钟玩转系列入门篇 (opens new window)
# 一、树莓派介绍
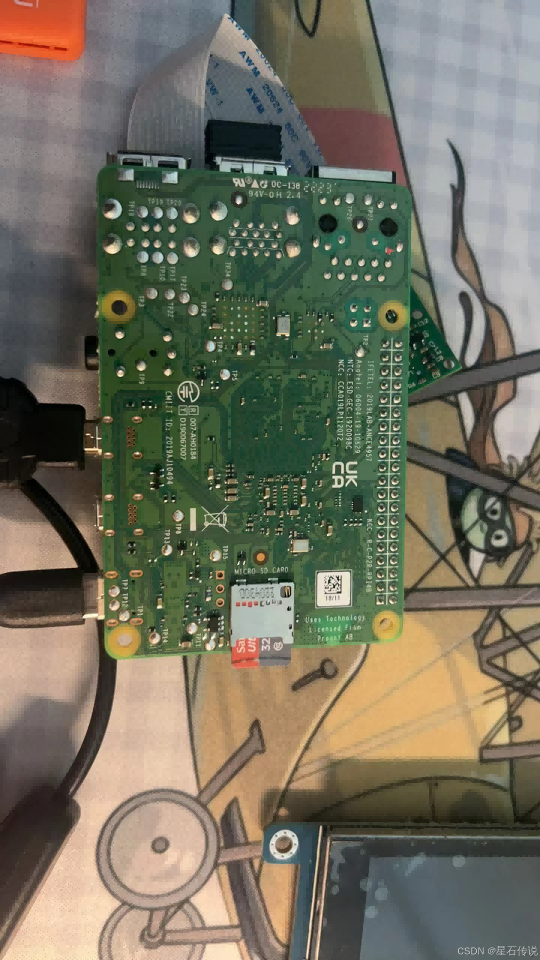
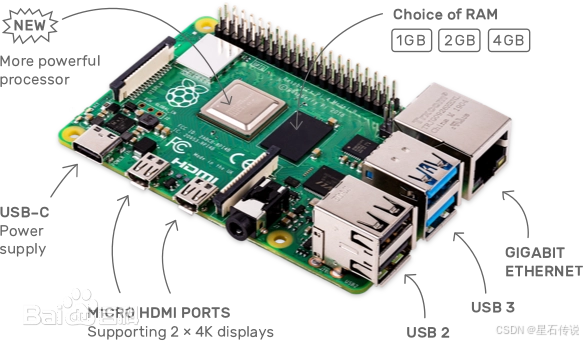
树莓派(Raspberry Pi)是一款信用卡大小的单板计算机. 百度百科介绍 (opens new window)、 官网 (opens new window)
- 树莓派开发板
- 安装Linux系统
- 链接设备 通过HDMI链接显示器 USB键盘 USB鼠标
- 用Python编写控制代码
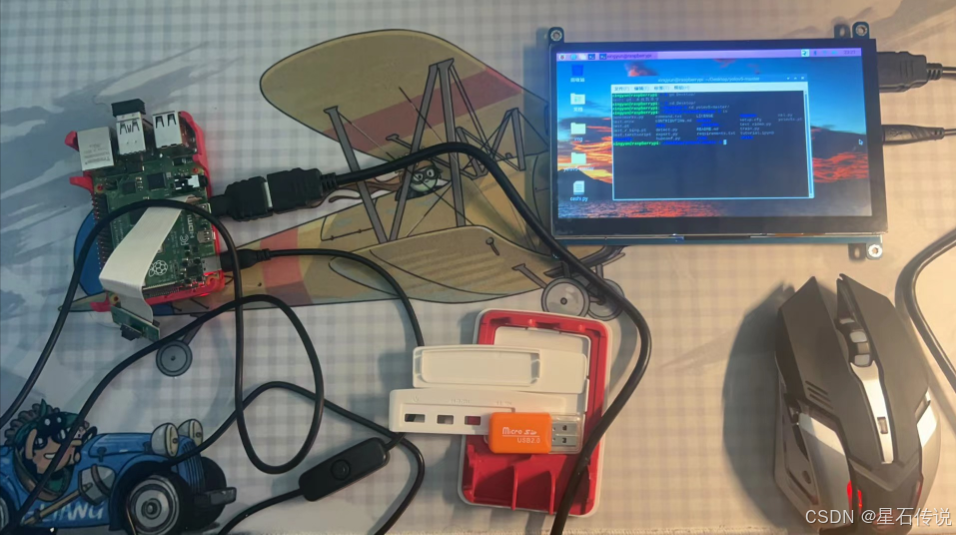
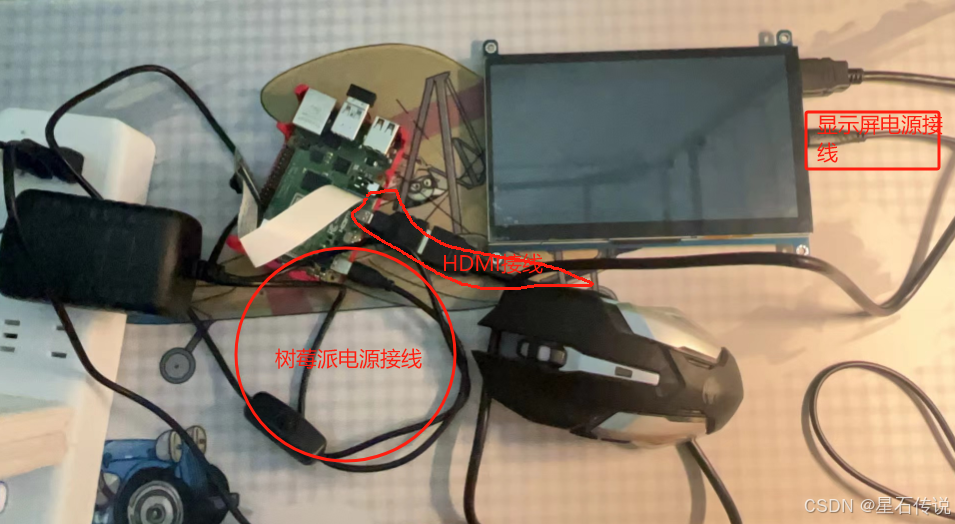
我使用的是树莓派4B 4GB主板,组装效果如图所示(包含CSI摄像头模块、树莓派主板、USB键盘鼠标、7寸显示器)
# 二、烧录系统
将树莓派系统,烧录到SD卡中,然后将SD插到树莓派,连接上HDMI就能看到开机画面
# 2.1. 准备
【树莓派64位版本】如果用到pytorch等AI相关功能,选择此版本
链接:https://pan.baidu.com/s/1mTBoVgr5Tg5ORQumAV0_1g?pwd=1wht (opens new window) 提取码:1wht --来自百度网盘超级会员V5的分享
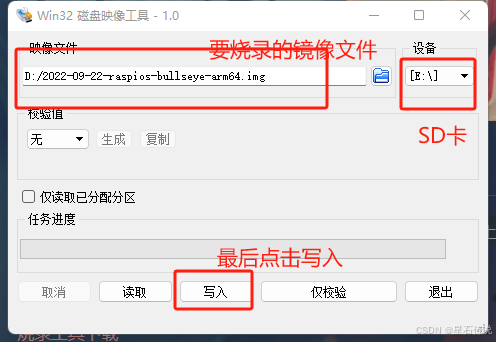
# 2.2. 烧录
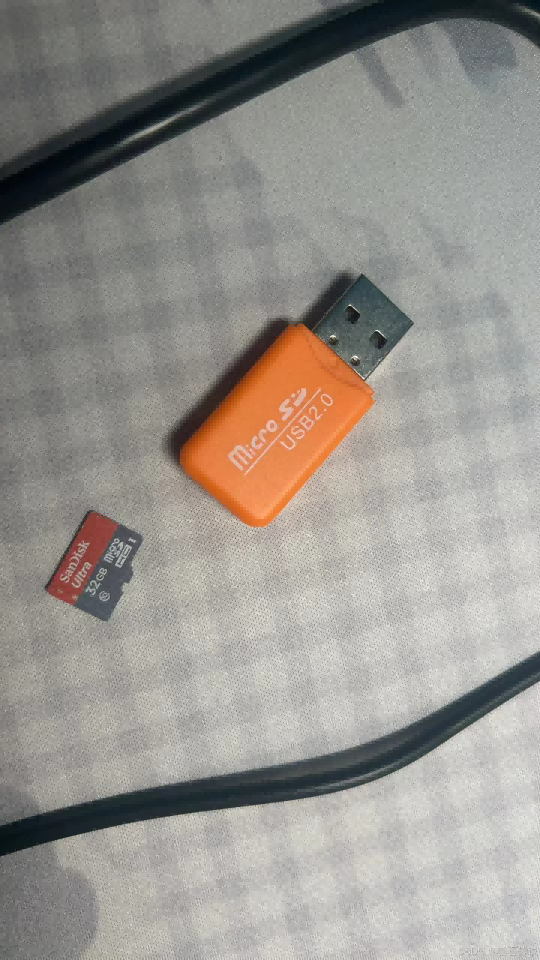
首先将SD卡插入电脑中,打开win32diskimager,选择要烧录的SD卡,选择要烧录的镜像文件,点击写入,等待写入完成。
写入完成后,取出SD卡,插入树莓派
# 三、运行树莓派
- 将SD卡插入树莓派后,连接上HDMI,USB键盘鼠标,电源
- 开机,等待开机完成,进入系统(若是第一次开机,要设置用户名密码等) 参考文章:第一次运行树莓派 (opens new window)
# 四、VNC远程树莓派
为了在电脑上可以远程控制树莓派屏幕显示的内容,便于开发调试,我们可以启用VNC远程桌面功能
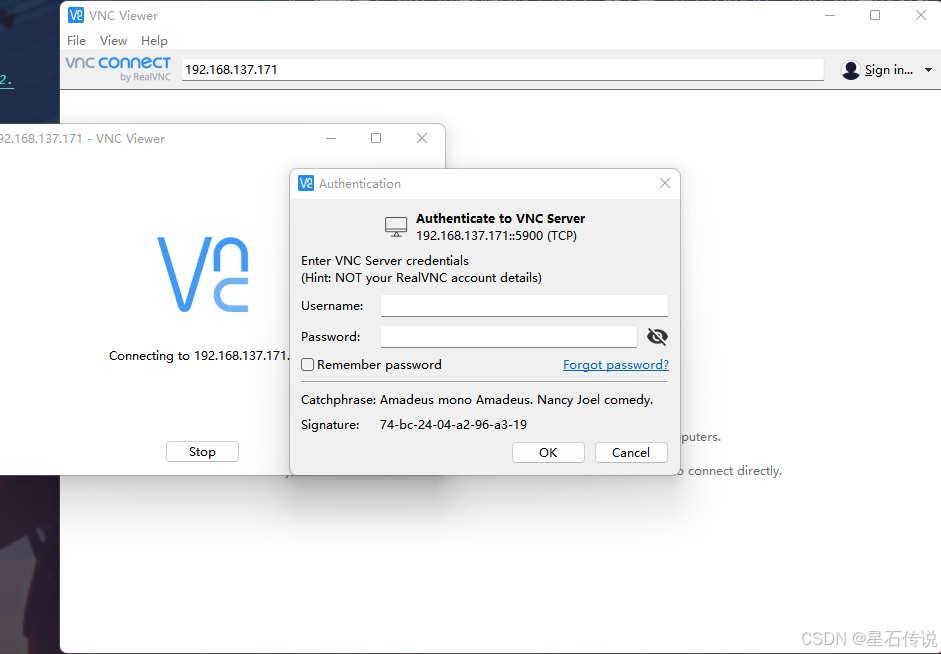
# 4.1. 在电脑上安装VNC Viewer
# 4.2. 树莓派上开启VNC功能
树莓派连接电脑移动热点: 如何使用树莓派连接电脑无线网络热点并查看树莓派ip地址 (opens new window)
输入树莓派ip地址,回车;之后输入之前设置的用户名密码,点击OK,即可进入树莓派桌面

# 4.3. 补充(传输文件)
开启VNC之后,可以在电脑上传输文件到树莓派
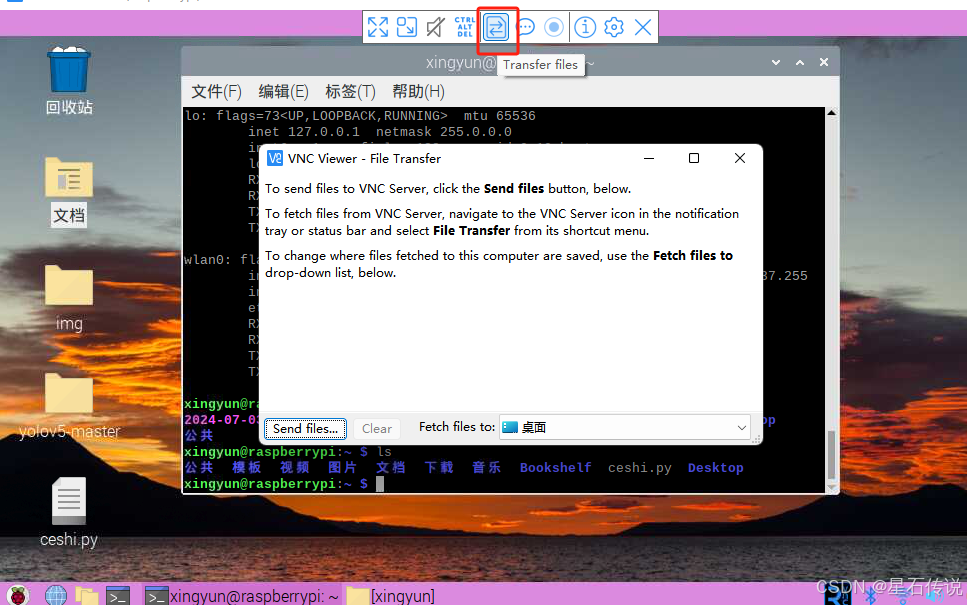
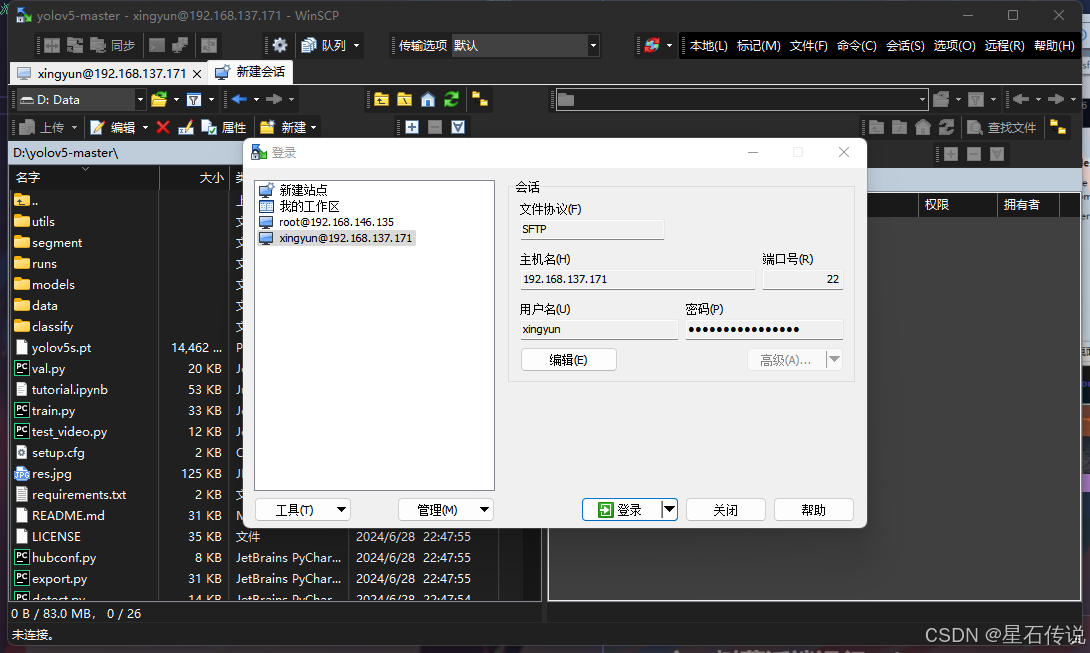
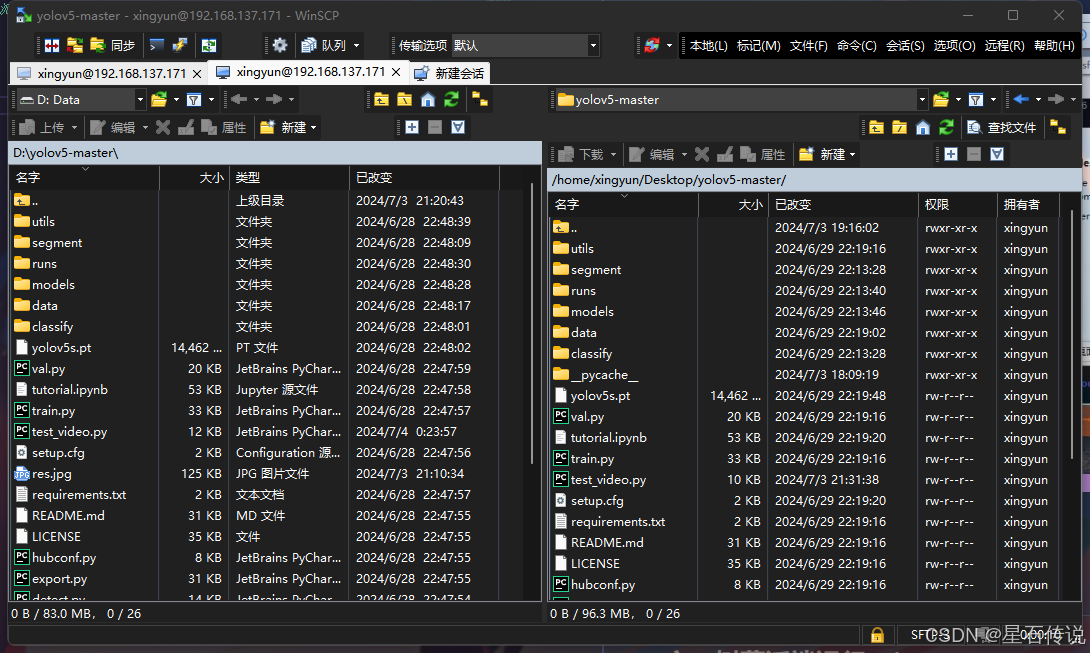
我一般使用WinSCP来进行文件的传输;
winscp的下载与使用,推荐文章:文件传输工具WinSCP下载安装教程 (opens new window)
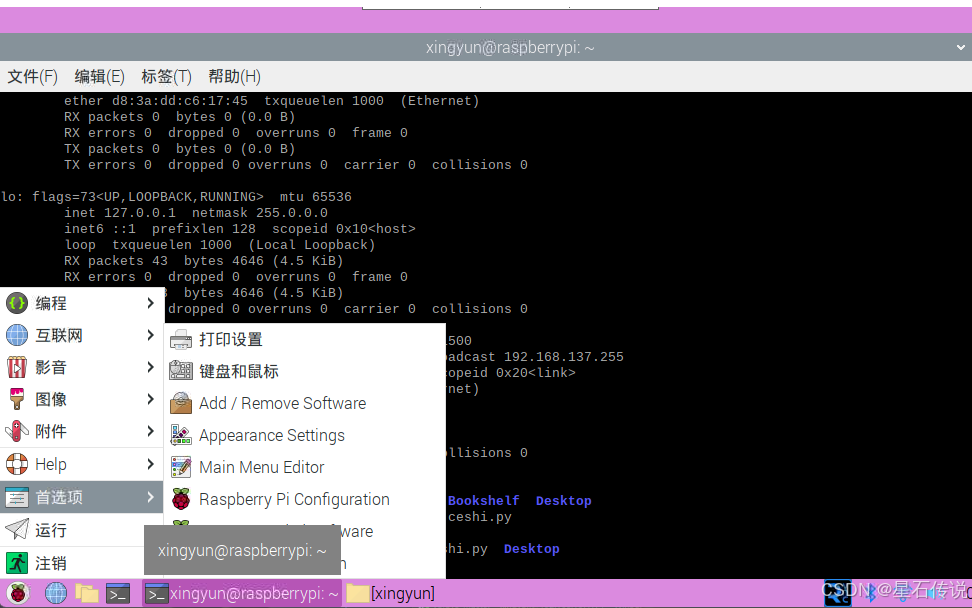
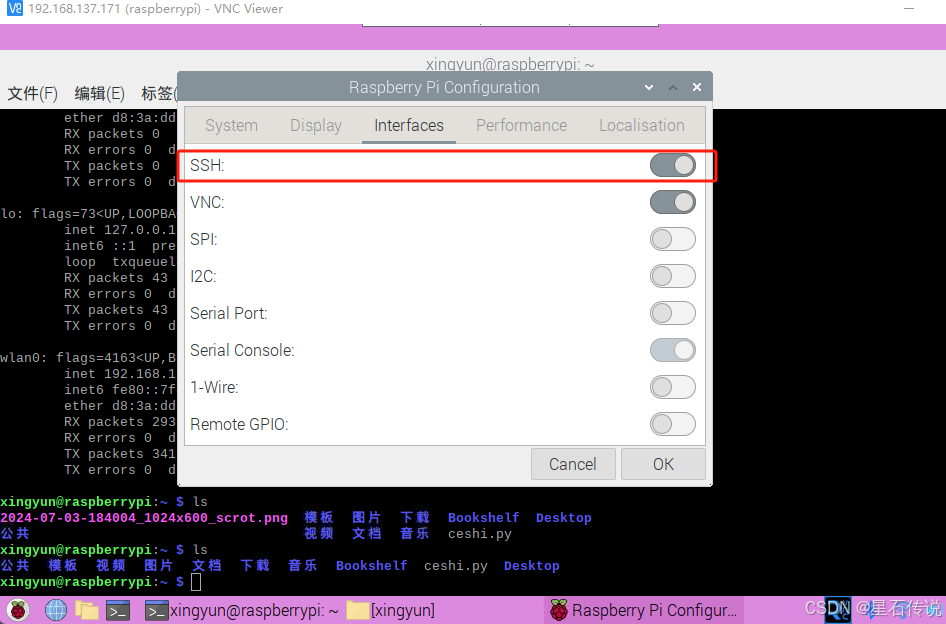
在这之前记得开启树莓派上的SSH
之后则是在电脑上打开WinSCP,选择树莓派的ip地址,输入用户名密码,即可进行文件传输
# 4.4. 补充(安装中文输入法)
树莓派默认安装的是英文输入法,如果需要中文输入法,需要安装中文输入法 树莓派4B——显示中文和添加中文输入法 (opens new window)
- 安装中文字体库(终端中输入以下命令):
sudo apt-get install ttf-wqy-zenhei
- 添加中文输入法sunpinyin和google拼音
sudo apt-get install fcitx fcitx-googlepinyin fcitx-module-cloudpinyin fcitx-sunpinyin
- 设置支持中文(在终端输入以下代码打开设置界面)
sudo raspi-config
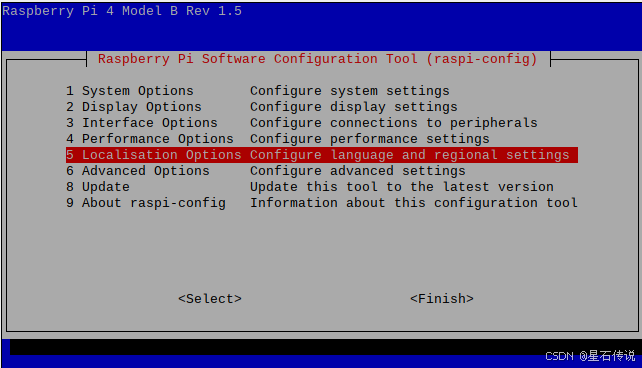
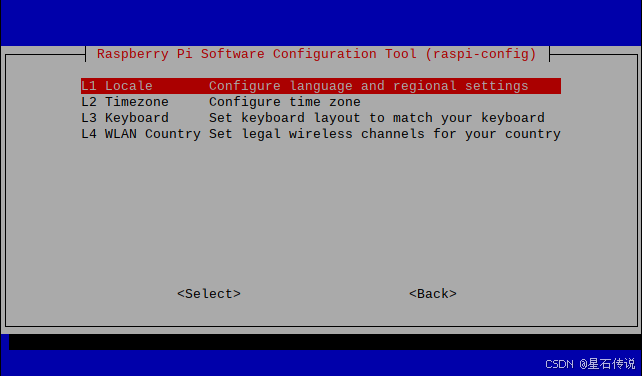
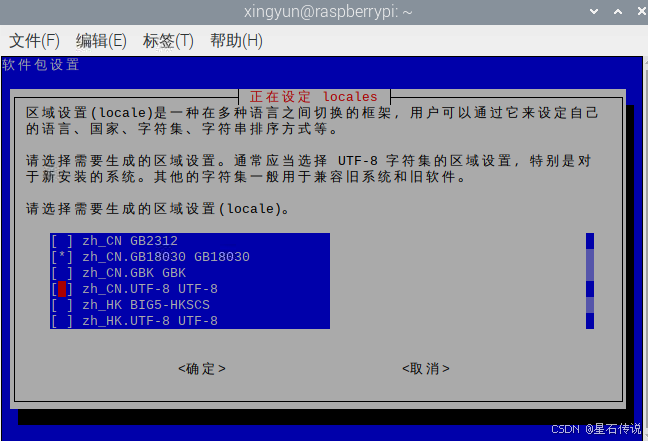
打开树莓派设置,修改character set为GB18030并确认,过程完成后会提示重启,重启即可
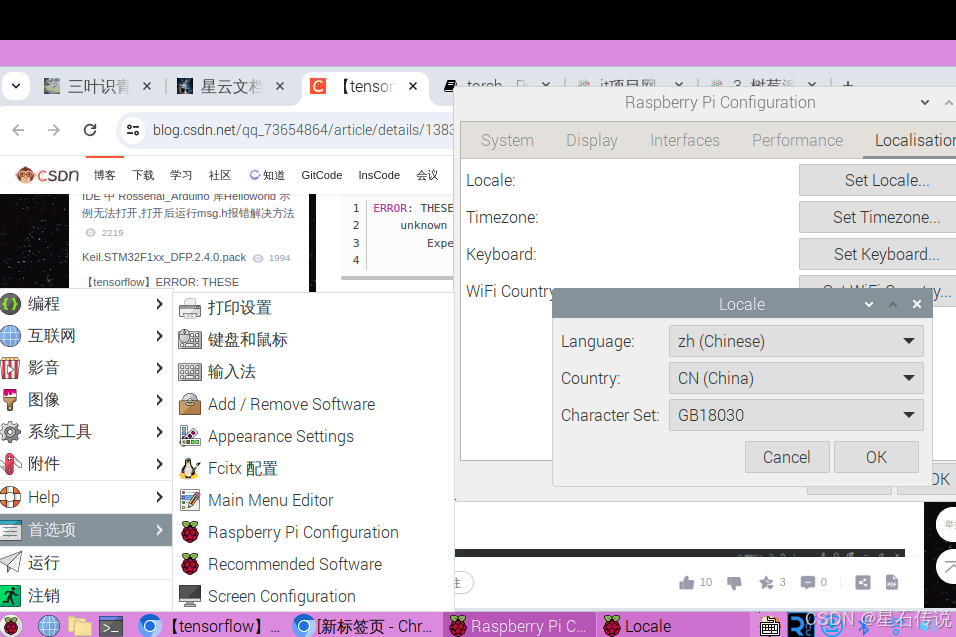
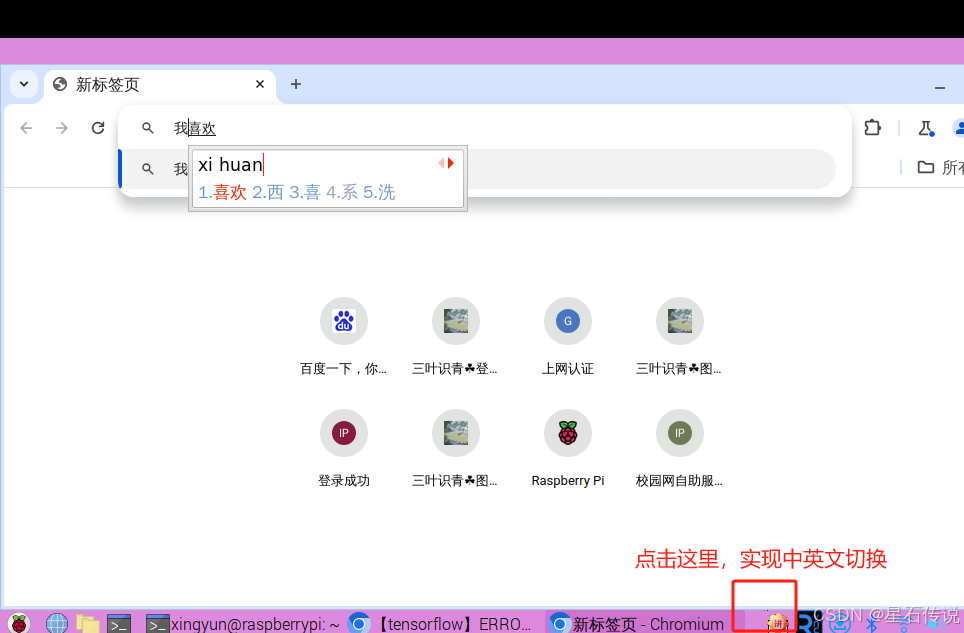
成功后,会出现一个键盘的小图标,点击即可切换输入法
# 五、opencv+摄像头模块的初步使用
首先下载opencv的python包
pip install opencv-python -i https://pypi.tuna.tsinghua.edu.cn/simple
#更新numpy
pip install numpy --upgrade -i https://pypi.tuna.tsinghua.edu.cn/simple
2
3
# 5.1. 组装摄像头模块
参考文章:树莓派4b使用摄像头+视频监控 (opens new window)
# 5.2. 测试摄像头
测试代码如下:
import cv2
cap = cv2.VideoCapture(0)  # 调用摄像头‘0’一般是打开电脑自带摄像头,‘1’是打开外部摄像头(只有一个摄像头的情况)
width = 1280
height = 960
cap.set(cv2.CAP_PROP_FRAME_WIDTH, width)  # 设置图像宽度
cap.set(cv2.CAP_PROP_FRAME_HEIGHT, height)  # 设置图像高度
# 显示图像
while True:
    ret, frame = cap.read()  # 读取图像(frame就是读取的视频帧,对frame处理就是对整个视频的处理)
    # print(ret)
    # ######例如将图像灰度化处理,
    img=cv2.cvtColor(frame,cv2.COLOR_BGR2GRAY)  # 转灰度图

    cv2.imshow("img", img)
    # #######图像不处理的情况
    cv2.imshow("frame", frame)

    input_str = cv2.waitKey(20)
    if input_str == ord('q'):  # 如过输入的是q就break,结束图像显示,鼠标点击视频画面输入字符
        break

cap.release()  # 释放摄像头
cv2.destroyAllWindows()  # 销毁窗口
2
3
4
5
6
7
8
9
10
11
12
13
14
15
16
17
18
19
20
21
22
23
打开树莓派自带的编程文件Thonny,然后运行此代码
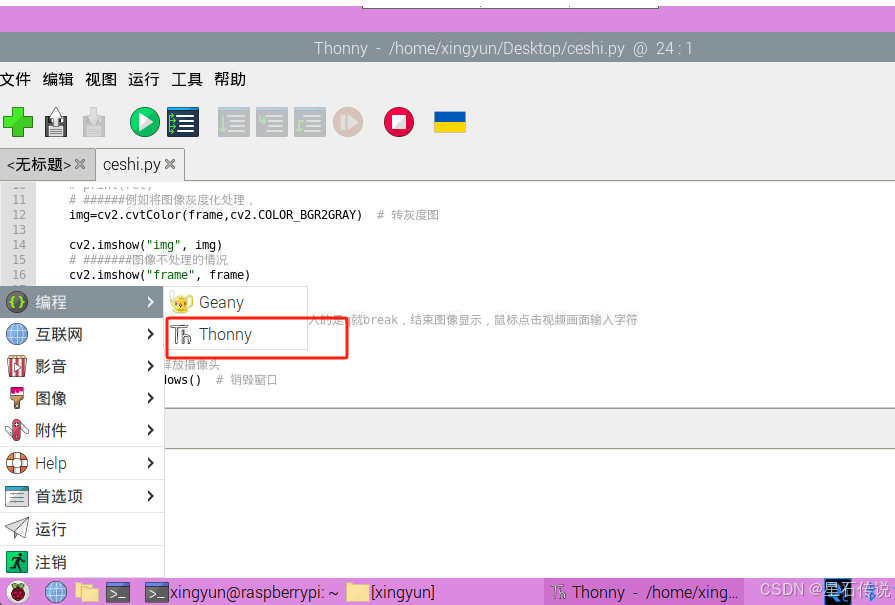
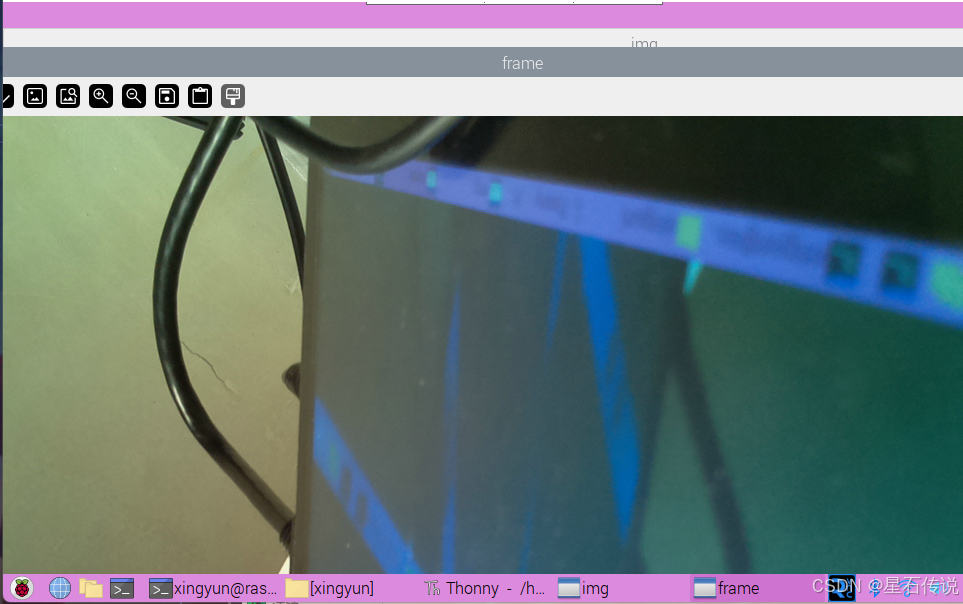
成功运行,打开摄像头!
# 六、PC端 YOLOv5识别图片
YOLO5识别象棋 在线参考视频 (opens new window); 参考文章 (opens new window)
租用GPU云服务器进行训练
#训练的命令:
python3 train.py --weights yolov5s.pt --data data/ChineseChess/ChineseChess.yaml --workers 4 --batch-size 20 --epochs 100
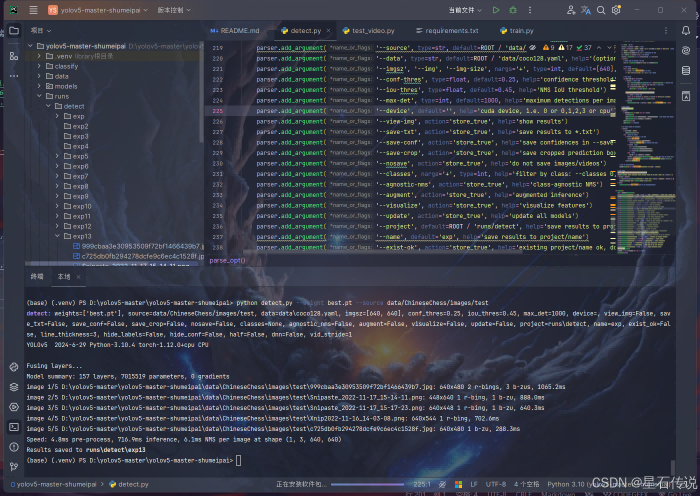
#识别的命令:
python3 detect.py --weight best.pt --source data/ChineseChess/images/test
2
3
4
5
代码下载(包含训练好的模型文件best.pt): 链接:https://pan.baidu.com/s/1bT9Cs8EmTI-5OeBn5-oLxQ?pwd=53ta (opens new window) 提取码:53ta --来自百度网盘超级会员V5的分享
使用pycharm打开该项目,配置好环境后,能正常运行
# 七、树莓派端运行yolov5
将代码目录上传到树莓派后,进入代码目录,在终端中运行:
# 安装依赖包,python版本在3.9到3.11之间都可以
pip install -r requirements.txt -i https://pypi.tuna.tsinghua.edu.cn/simple
2
# 运行测试图片识别
python detect.py --weight best.pt --source data/ChineseChess/images/test
2
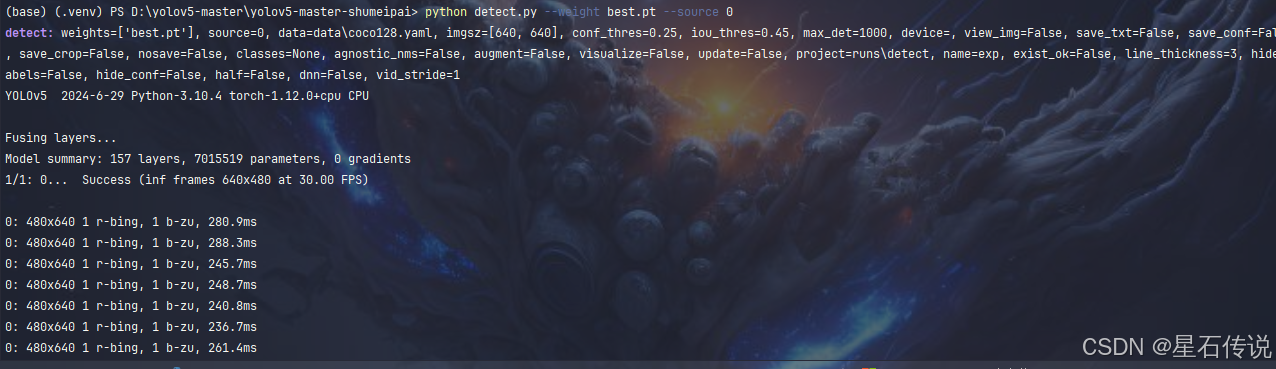
#打开摄像头实时识别
python detect.py --weight best.pt --source 0
2
与PC端的操作大致一样
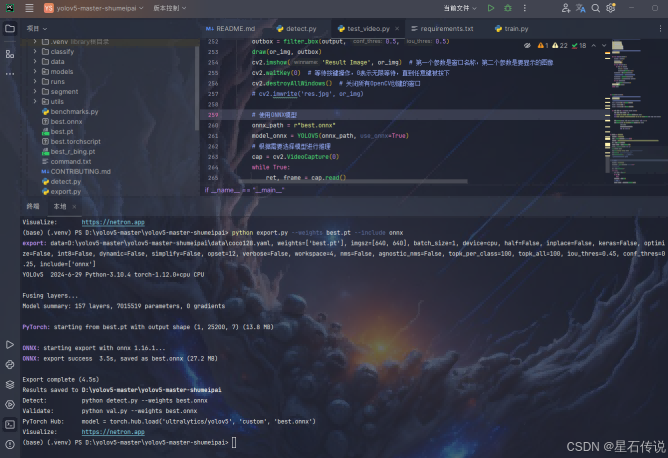
# 八、使用onnx加速
生成所需的onnx模型,并安装onnx和onnxruntime
#安装onnx和onnxruntime
pip install onnx onnxruntime -i https://pypi.tuna.tsinghua.edu.cn/simple

#生成onnx模型
python export.py --weights best.pt --include onnx
2
3
4
5
6
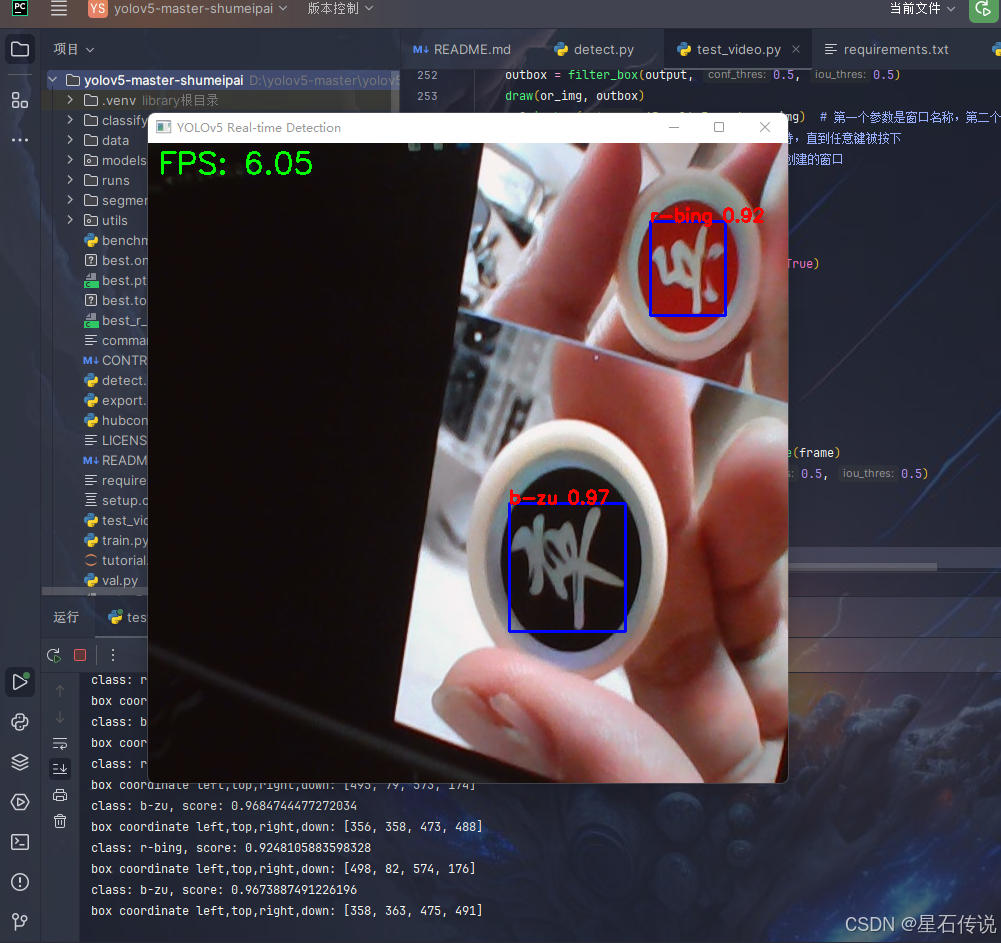
编写一个代码文件test_video.py,用来运行onnx模型文件,并实时显示摄像头画面和帧率
import cv2
import numpy as np
import onnxruntime
import time
import torch

CLASSES = ['r-bing', 'b-zu']


class YOLOV5:
    def __init__(self, model_path, use_onnx=False):
        self.use_onnx = use_onnx
        if use_onnx:
            self.session = onnxruntime.InferenceSession(model_path)
            self.input_name = self.get_input_name()
            self.output_name = self.get_output_name()
        else:
            # 有点问题,算了
            device = torch.device("cuda:0" if torch.cuda.is_available() else "cpu")
            self.model = torch.load(model_path, map_location=device)
            self.model.eval()

    def get_input_name(self):
        if self.use_onnx:
            input_name = [node.name for node in self.session.get_inputs()]
            return input_name
        else:
            raise NotImplementedError("This method is only for ONNX models.")

    def get_output_name(self):
        if self.use_onnx:
            output_name = [node.name for node in self.session.get_outputs()]
            return output_name
        else:
            raise NotImplementedError("This method is only for ONNX models.")

    def preprocess_image(self, image):
        # 图像预处理逻辑,与原始逻辑保持一致
        resized_img = cv2.resize(image, (640, 640))
        img_tensor = resized_img[:, :, ::-1].transpose(2, 0, 1)  # BGR to RGB, HWC to CHW
        img_tensor = img_tensor.astype(np.float32)
        img_tensor /= 255.0
        img_tensor = np.expand_dims(img_tensor, axis=0)
        return img_tensor, resized_img

    def inference_pt(self, img):
        img_tensor, resized_img = self.preprocess_image(img)
        with torch.no_grad():
            outputs = self.model(torch.from_numpy(img_tensor))
        return outputs.detach().numpy(), resized_img

    def inference_onnx(self, img):
        img_tensor, resized_img = self.preprocess_image(img)
        input_feed = {self.input_name[0]: img_tensor}
        pred = self.session.run(None, input_feed)[0]
        return pred, resized_img

    def inference(self, img):
        if self.use_onnx:
            return self.inference_onnx(img)
        else:
            return self.inference_pt(img)


# dets:  array [x,6] 6个值分别为x1,y1,x2,y2,score,class
# thresh: 阈值
def nms(dets, thresh):
    x1 = dets[:, 0]
    y1 = dets[:, 1]
    x2 = dets[:, 2]
    y2 = dets[:, 3]
    # -------------------------------------------------------
    #   计算框的面积
    #	置信度从大到小排序
    # -------------------------------------------------------
    areas = (y2 - y1 + 1) * (x2 - x1 + 1)
    scores = dets[:, 4]
    keep = []
    index = scores.argsort()[::-1]

    while index.size > 0:
        i = index[0]
        keep.append(i)
        # -------------------------------------------------------
        #   计算相交面积
        #	1.相交
        #	2.不相交
        # -------------------------------------------------------
        x11 = np.maximum(x1[i], x1[index[1:]])
        y11 = np.maximum(y1[i], y1[index[1:]])
        x22 = np.minimum(x2[i], x2[index[1:]])
        y22 = np.minimum(y2[i], y2[index[1:]])

        w = np.maximum(0, x22 - x11 + 1)
        h = np.maximum(0, y22 - y11 + 1)

        overlaps = w * h
        # -------------------------------------------------------
        #   计算该框与其它框的IOU,去除掉重复的框,即IOU值大的框
        #	IOU小于thresh的框保留下来
        # -------------------------------------------------------
        ious = overlaps / (areas[i] + areas[index[1:]] - overlaps)
        idx = np.where(ious <= thresh)[0]
        index = index[idx + 1]
    return keep


def xywh2xyxy(x):
    # [x, y, w, h] to [x1, y1, x2, y2]
    y = np.copy(x)
    y[:, 0] = x[:, 0] - x[:, 2] / 2
    y[:, 1] = x[:, 1] - x[:, 3] / 2
    y[:, 2] = x[:, 0] + x[:, 2] / 2
    y[:, 3] = x[:, 1] + x[:, 3] / 2
    return y


def filter_box(org_box, conf_thres, iou_thres):  # 过滤掉无用的框
    # -------------------------------------------------------
    #   删除为1的维度
    #	删除置信度小于conf_thres的BOX
    # -------------------------------------------------------
    org_box = np.squeeze(org_box)
    conf = org_box[..., 4] > conf_thres
    box = org_box[conf == True]
    # -------------------------------------------------------
    #	通过argmax获取置信度最大的类别
    # -------------------------------------------------------
    cls_cinf = box[..., 5:]
    cls = []
    for i in range(len(cls_cinf)):
        cls.append(int(np.argmax(cls_cinf[i])))
    all_cls = list(set(cls))
    # -------------------------------------------------------
    #   分别对每个类别进行过滤
    #	1.将第6列元素替换为类别下标
    #	2.xywh2xyxy 坐标转换
    #	3.经过非极大抑制后输出的BOX下标
    #	4.利用下标取出非极大抑制后的BOX
    # -------------------------------------------------------
    output = []

    for i in range(len(all_cls)):
        curr_cls = all_cls[i]
        curr_cls_box = []
        curr_out_box = []
        for j in range(len(cls)):
            if cls[j] == curr_cls:
                box[j][5] = curr_cls
                curr_cls_box.append(box[j][:6])
        curr_cls_box = np.array(curr_cls_box)
        # curr_cls_box_old = np.copy(curr_cls_box)
        curr_cls_box = xywh2xyxy(curr_cls_box)
        curr_out_box = nms(curr_cls_box, iou_thres)
        for k in curr_out_box:
            output.append(curr_cls_box[k])
    output = np.array(output)
    return output


def draw(image, box_data):
    # -------------------------------------------------------
    #	取整,方便画框
    # -------------------------------------------------------
    boxes = box_data[..., :4].astype(np.int32)
    scores = box_data[..., 4]
    classes = box_data[..., 5].astype(np.int32)

    for box, score, cl in zip(boxes, scores, classes):
        top, left, right, bottom = box
        print('class: {}, score: {}'.format(CLASSES[cl], score))
        print('box coordinate left,top,right,down: [{}, {}, {}, {}]'.format(top, left, right, bottom))

        cv2.rectangle(image, (top, left), (right, bottom), (255, 0, 0), 2)
        cv2.putText(image, '{0} {1:.2f}'.format(CLASSES[cl], score),
                    (top, left),
                    cv2.FONT_HERSHEY_SIMPLEX,
                    0.6, (0, 0, 255), 2)


if __name__ == "__main__":
    onnx_path = r"best.onnx"
    model = YOLOV5(onnx_path, use_onnx=True)
    img_path = r"D:\yolov5-master\data\ChineseChess\images\test\Snipaste_2022-11-17_15-14-11.png"
    img = cv2.imread(img_path)
    output, or_img = model.inference(img)
    outbox = filter_box(output, 0.5, 0.5)
    draw(or_img, outbox)
    cv2.imshow('Result Image', or_img)  # 第一个参数是窗口名称,第二个参数是要显示的图像
    cv2.waitKey(0)  # 等待按键操作,0表示无限等待,直到任意键被按下
    cv2.destroyAllWindows()  # 关闭所有OpenCV创建的窗口
    # cv2.imwrite('res.jpg', or_img)

    # 使用ONNX模型
    onnx_path = r"best.onnx"
    model_onnx = YOLOV5(onnx_path, use_onnx=True)
    # 根据需要选择模型进行推理
    cap = cv2.VideoCapture(0)
    while True:
        ret, frame = cap.read()
        if not ret:
            break
        start_time = time.time()
        # 使用ONNX模型推理
        output, or_img = model_onnx.inference(frame)
        outbox = filter_box(output, 0.5, 0.5)
        if outbox.size > 0:
            draw(or_img, outbox)
        else:
            print("No detections found.")
            # 即使没有检测到物体,也应该使用原始图像or_img来显示FPS,但这里直接使用frame假设没有改变它
            or_img = frame  # 确保or_img是最新的图像
        end_time = time.time()
        fps = 1.0 / (end_time - start_time)
        cv2.putText(or_img, f'FPS: {fps:.2f}', (10, 30), cv2.FONT_HERSHEY_SIMPLEX, 1, (0, 255, 0), 2)  # 在带有预测框的图像上写入FPS
        cv2.imshow('YOLOv5 Real-time Detection', or_img)  # 确保显示带有FPS和预测框的图像
        if cv2.waitKey(1) & 0xFF == ord('q'):
            break
    cap.release()
    cv2.destroyAllWindows()
2
3
4
5
6
7
8
9
10
11
12
13
14
15
16
17
18
19
20
21
22
23
24
25
26
27
28
29
30
31
32
33
34
35
36
37
38
39
40
41
42
43
44
45
46
47
48
49
50
51
52
53
54
55
56
57
58
59
60
61
62
63
64
65
66
67
68
69
70
71
72
73
74
75
76
77
78
79
80
81
82
83
84
85
86
87
88
89
90
91
92
93
94
95
96
97
98
99
100
101
102
103
104
105
106
107
108
109
110
111
112
113
114
115
116
117
118
119
120
121
122
123
124
125
126
127
128
129
130
131
132
133
134
135
136
137
138
139
140
141
142
143
144
145
146
147
148
149
150
151
152
153
154
155
156
157
158
159
160
161
162
163
164
165
166
167
168
169
170
171
172
173
174
175
176
177
178
179
180
181
182
183
184
185
186
187
188
189
190
191
192
193
194
195
196
197
198
199
200
201
202
203
204
205
206
207
208
209
210
211
212
213
214
215
216
217
218
219
220
221
# 总结
本文主要记录了我学习树莓派时的笔记,包括对树莓派的认识和组装、树莓派的运行和VNC远程连接、摄像头模块的使用、以及最后的使用yolov5来对象棋进行识别等。 (尝试了以下租用GPU 进行训练,不得不说与之前使用kaggle平台相比,还是氪金玩家比较爽。省去了配置环境的麻烦) 另外,也是因为目前暂时没有yolo的三叶青标记数据,所以数据是从其它教程中找过来的。